
Generating and sending GWA Tax Receipts
A. Data Setup Workflow (with 2020 as example year)
Create mailout data source (incl new approach with ID field) in Microsoft Excel
- Copy 2020 donations tab a new 2020-TAX tab
- Delete all rows that do not need a receipt – Nil TAX DEDUCTIBLE portion, in kind, etc.
- Ensure “TAX DEDUCTIBLE portion” column has all contributions but not any payments!
- Delete all columns except those needed:
– No., LAST Name, First Name, Full Amount, TAX DEDUCTIBLE portion, Received - Setup new ID field
- Sort 2020-TAX by Last & First Name
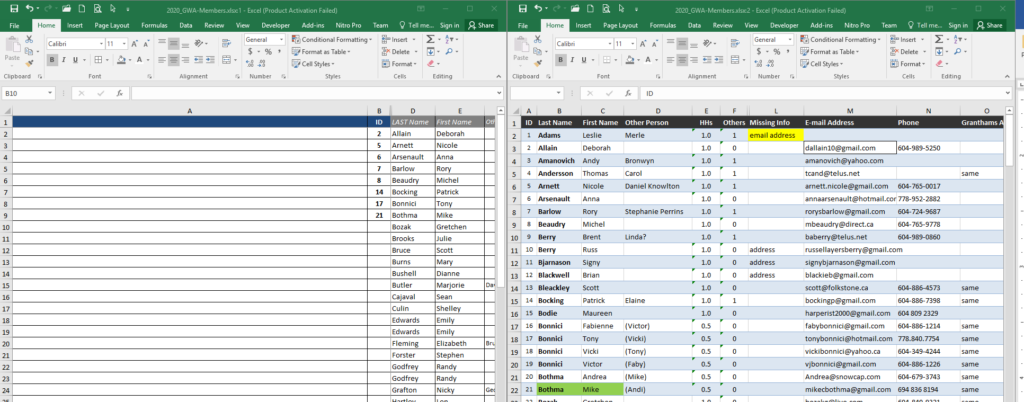
- Display 2nd view with MASTER Tab (EXCEL: New Window tool on View tab)
- Display 2020-TAX side-by-side (EXCEL: Arrange All tool on View tab: Vertical)
- Add IDs to TAX tab manually
– do not combine multiple donations from same person
– use ID of ??? for those not on members list
- 5. Insert new columns in 2020-TAX tab
- Hide MASTER tab view (don’t close til done)
- Delete top (TITLE) row to leave column headings at top
- Copy First Name, Last Name, Address, and Email field headings from TAX tab for previous year
- Copy first row of these fields from TAX tab for previous year
- Confirm VLOOKUP is working for this first record
- Copy & paste these fields to all other records
- 6. Check all data
- Ensure all required fields are populated: Dates, Names, etc
- May need to format dates (copy and paste as values)
- Fill in the unknown data ON MASTER tab as best as possible
- Split window with Master tab as done above
- Can hide columns B-F on 2020-TAX tab if desired
- Look up people on web
- Email? Send receipt to their GWA friend/contact’s email
- Address? Just use town name for address
- Insert new FULL_NAME field and populate (with =I2&” “&H2)
- REFERENCE ONLY – ORIGINAL SETUP for FIRST TIME (e.g. for 2020)
- use VLOOKUP using ID to populate with values from MASTER tab (see notes above**)
- copy & paste “=VLOOKUP($A2,MASTER!$A$2:$P$189,C,FALSE)” into required fields
- replace C with required column number; for current MASTER list set to:
- 2 for last name
- 3 for first name
- 13 for email address
- 16 for street address
B. Mailout Workflow
Create/revise document in Microsoft Word
- Copy 2019 doc (Official Donation Receipt 2019-TAX.docx) to a new 2020 version
- Open and update content as needed (incl. search/replace 2019/2020 – 4 times & 2020/2021 – 2 times)
- Mailings tab > Select Recipients > Use an Existing List… > +Connect New Data Source.odc > ODBC DSN > Excel Files > select XLS file and tab
- Insert Merge Field to update fields as needed (including ID for receipt number)
- Start Mail Merge > Step-by-Step Wizard… (output as Letter, not Email)
- Check results by scrolling thru a few records on Preview pane (step 5 of 6 in Wizard)
- Print to single PDF doc in 2020 folder (with a page for each receipt) with filename like: GWA-2019-Donation-Receipt.docx
Note: Could not get bulk email to work with webmail account (need Outlook or Outlook Express desktop application I think), so used this manual workflow to send:
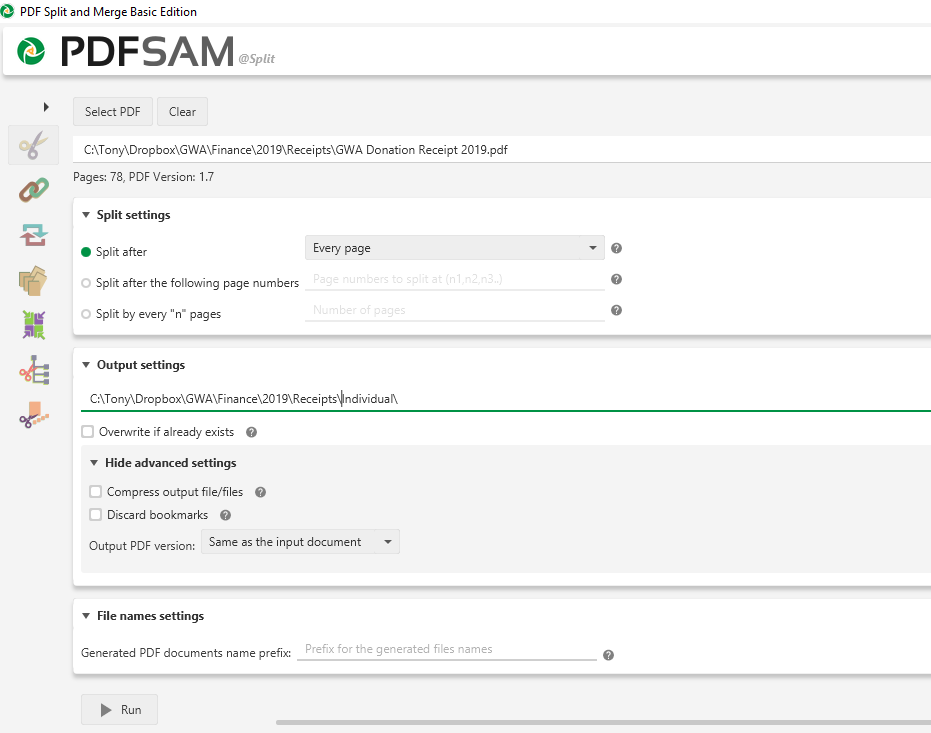
8. Use PDFSAM (free download) to split PDF doc into individual docs in Individual subfolder
(can rename in bulk if needed: select all PDFs, right-click, rename)
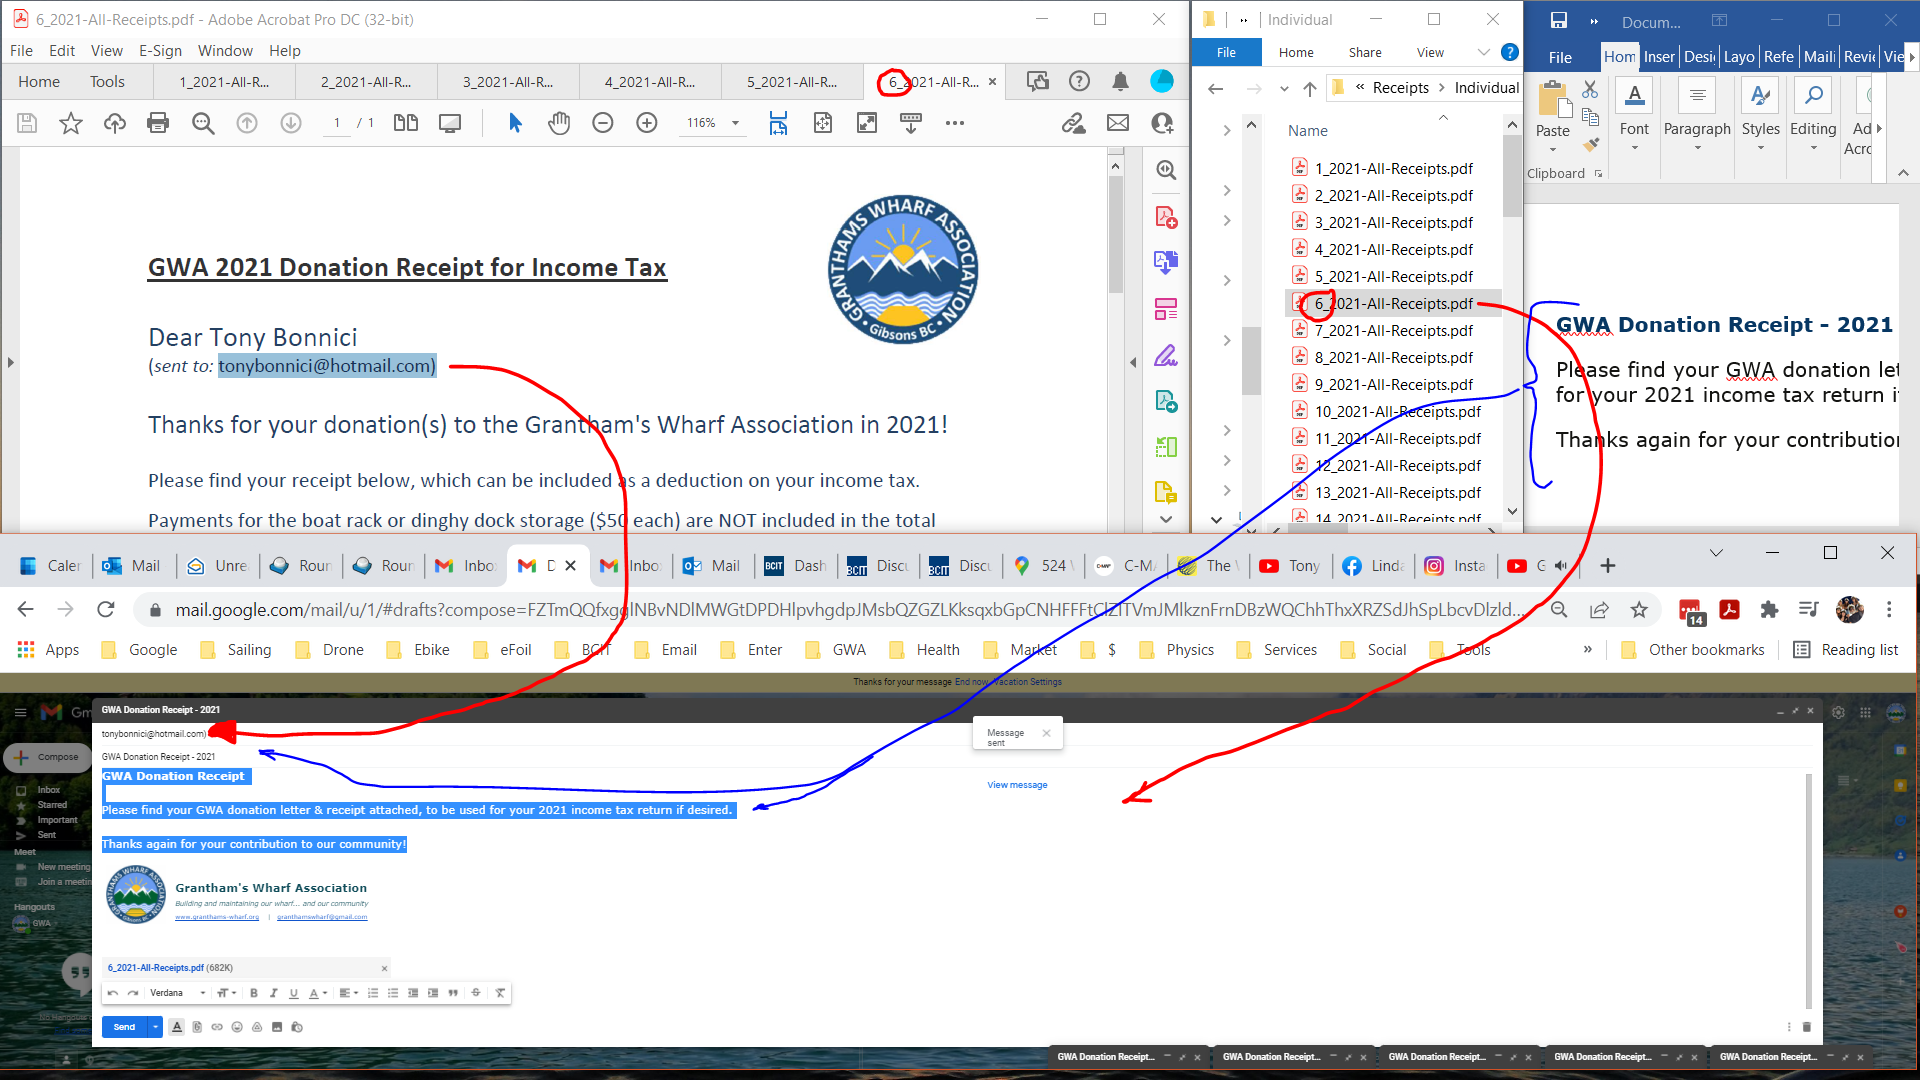
9. Display 2023-TAX with sequential numbering to match PDFsam output filenames beside File Explorer with all receipts listed
10. Put emails requesting recipt on other screen.
11. For each email, reply, paste note, lookup number in XLS, and drag corresponding PDF receipt onto email and send.
That’s it.
STEPS BELOW ARE RETIRED for 2023 receipts !!
9. Set up monitor screen as shown below with:
– Acrobat, Word (*GWAtax.docx), File Explorer, GWA Gmail (at 50% zoom)
– and GWA help this page on other monitor
Word doc contents*
GWA Donation Receipt – 2019
Please find your GWA donation letter & receipt attached, to be used for your 2020 income tax return if desired.
Thanks again for your contribution to our community!
10. LOOP 1: for each set of 10 PDFs
– Open 10 PDFs at a time in Acrobat
– select & right-click > Open – or – Drag into Acrobat
– click Compose in Gmail ten times
11. LOOP 2: for each of the 10 open PDF docs/email messages
– click on each New Message tab
– copy subject text (from doc) to each
– copy message text (from doc) to each again including 2 or 3 blank lines at end – {Tab]x2 to get into message area
13. LOOP 3: for each of the 10 open PDF docs/email messages
– open new Email by clicking on its tab
– select email address from PDF file, in numerical order (select from right and include “)” so default email app not opened)
– paste address into To: field and delete “)”
– drag corresponding PDF file from File Explorer straight down into email (base correspondence on number in PDF title bar as shown above)
– Hit Send on email – Close PDF file in Acrobat (click X on tab)
– Try to stay cool :o)
Tony – revised 3 march 2024